
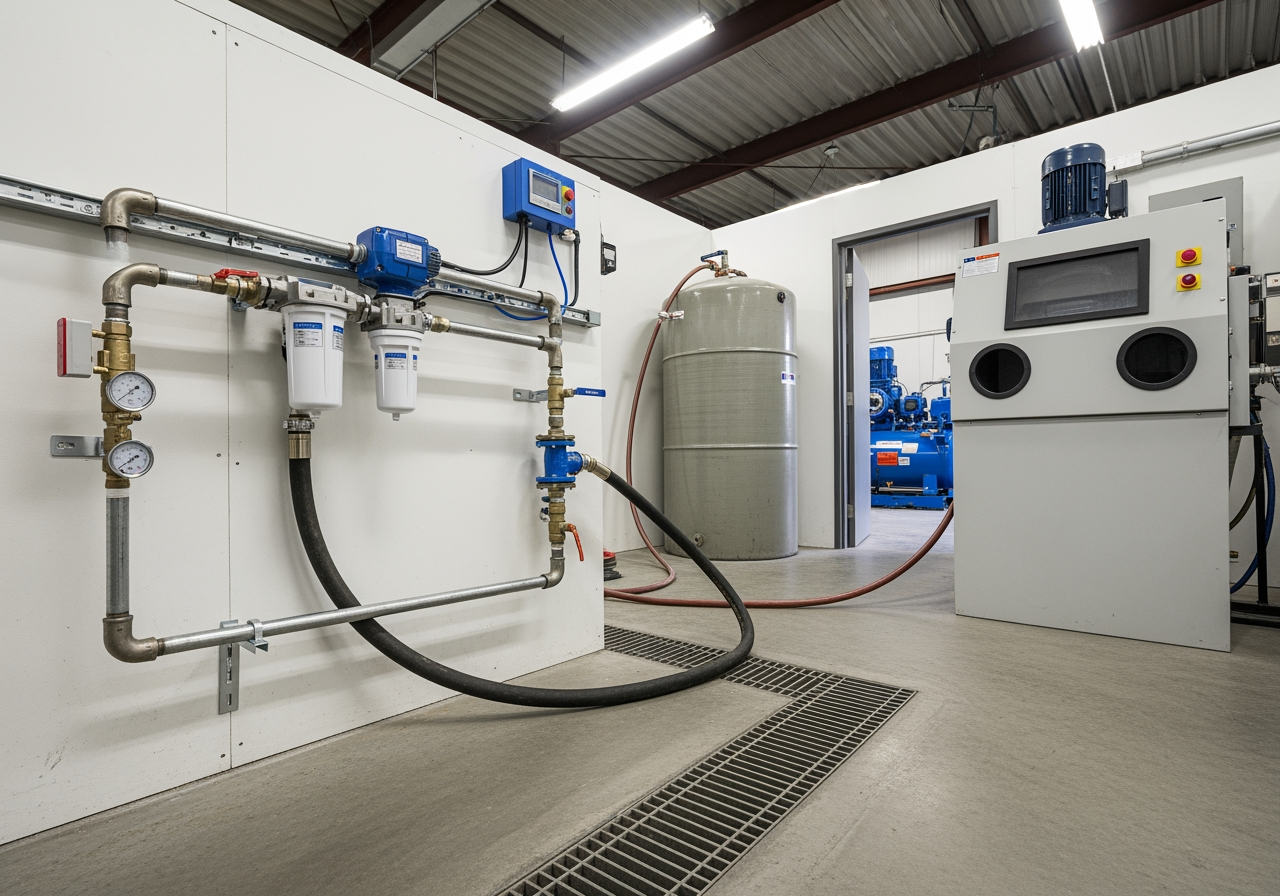
Installing a wet abrasive blaster transforms workshop capabilities. But proper setup determines whether the equipment becomes a productivity asset or an expensive problem. The difference between a smooth integration and costly downtime comes down to understanding spatial requirements, utility specifications, and workflow considerations before the equipment arrives.
Workshop managers evaluating wet abrasive blasters need concrete specifications – not vague guidelines. A typical wet abrasive blasting system requires 4-6 square metres of floor space, three-phase power, compressed air supply, and adequate drainage. Miss any of these requirements, and installation delays can stretch from days into weeks.
This guide covers setup requirements in full so you can plan workshop integration planning before your machine arrives.
Physical Space and Floor Requirements
Floor Space, Load Capacity, and Ceiling Height
Wet abrasive blasters demand more abrasive blasting workshop space than their footprint suggests. A standard cabinet measuring 1,200mm by 1,200mm by 1,800mm needs at least 2 metres of clearance on the operator side for comfortable access and parts handling. Add another metre behind the unit for maintenance access to pumps, filters, and electrical components.
Floor loading capacity matters more than most workshops anticipate. A fully operational wet blaster – including cabinet, water tank, slurry, and abrasive media – can weigh 800-1,200 kilograms. Standard workshop concrete handles this easily. Mezzanine floors or older structures may require reinforcement. Check load ratings before positioning equipment.
Abrasive blasting workshop space planning must include ceiling height. Allow minimum 2.5 metres clearance for standard units. Mining workshops handling excavator components or large fabrication facilities need 4 or more metres of clearance for crane access.
The floor surface needs proper drainage capability. Wet abrasive blasting generates overspray and occasional spills during media changes or maintenance. A slight floor slope towards drainage points prevents pooling. Workshops without adequate floor drains often install containment trays, adding $500-$1,500 to setup costs.
Drainage Capability and Floor Gradient
The floor drain for your wet abrasive blaster setup connects to your drainage infrastructure. The gradient and capacity of this drain determine whether wastewater is managed effectively or becomes a compliance risk.
A minimum 1:100 floor gradient toward the drain prevents water pooling. The drain itself must handle the full discharge volume from tank changes. Undersized floor wastes designed for mop water overflow when you drain a 400-600 litre tank.
Workshop integration planning should assess your existing floor drains before selecting machine location. If the ideal workflow position lacks adequate drainage, factor retrofit costs into your budget from the start.
Electrical Supply Specifications
Three-Phase Power and Dedicated Circuits
Three-phase power is non-negotiable for industrial wet abrasive blasters. Most systems require 415V, 32-amp supply with proper circuit protection. Smaller manual units may operate on 240V single-phase, but automated systems with recirculation pumps, heaters, and control systems need three-phase capacity.
The electrical supply must be dedicated – not shared with other high-draw equipment. Running a wet abrasive blaster on the same circuit as welders, compressors, or heavy duty parts washers creates voltage drops that damage motors and control systems.
Distance from the switchboard affects installation costs significantly. Electrical runs exceeding 20 metres require larger cable gauge to compensate for voltage drop. A qualified electrician should verify supply capacity before equipment delivery. Discovering inadequate power during installation adds 2-4 days and $1,500-$3,000 in upgrade costs.
Ground Fault Protection and Cable Sizing
Ground fault protection is mandatory for wet abrasive blasting systems. The combination of water, electricity, and metal cabinets creates potential electrical hazards. Install residual current devices (RCDs) rated for industrial equipment – typically 30mA for personnel protection. This is required under Australian workplace safety standards.
Hot blasters and wet abrasive blasters share similar electrical safety requirements. Both use water-based processes that demand RCD protection and proper earthing.
Cable sizing follows the same principle as other industrial equipment: undersized cables create voltage drop and overheating. A qualified electrician provides compliance certificates alongside the installation – keep these on file for WorkSafe inspections.
Compressed Air System Requirements
Air Volume, Pressure, and Line Sizing
Abrasive blasting compressed air consumption is one of the most underestimated requirements. Wet abrasive blasters consume 150-300 litres per minute at 80-100 PSI. Compare this to your existing workshop air demand. A standard automotive workshop compressor producing 200 litres per minute struggles when running the blaster alongside air tools, spray guns, or other pneumatic equipment.
Abrasive blasting compressed air line sizing matters as much as volume. The supply line should be minimum 19mm (3/4 inch) internal diameter for runs up to 15 metres. Longer distances or higher flow requirements need 25mm (1 inch) lines to prevent pressure drop. Undersized air lines create weak blasting performance and excessive compressor cycling.
Position the air supply connection within 3 metres of the blaster cabinet. Long air hoses create pressure loss and become trip hazards in busy workshops. Use quick-disconnect fittings rated for industrial service.
Air Quality and Moisture Control
Air quality matters as much as volume. Moisture and oil contamination in compressed air lines ruins abrasive media and creates inconsistent blasting results. Install a dedicated air preparation system including a primary moisture separator, coalescing filter, and pressure regulator.
An air dryer is optional for most applications but strongly recommended in humid climates or workshops where consistent blasting quality is critical. Workshop integration planning for wet abrasive systems should include an air quality assessment alongside volume and pressure checks.
Water Supply and Wet Blaster Drainage System
Water Pressure, Flow Rate, and Quality
Municipal water supply works for most wet abrasive blasting applications. Flow rate requirements are modest – typically 20-40 litres per minute for initial fill and rinse cycles. Most workshops have adequate supply pressure with a minimum 40 PSI recommended. Install a dedicated water line with isolation valve for maintenance and emergency shutoff.
Water temperature affects blasting efficiency. Cold water (below 15 degrees Celsius) reduces cleaning power and extends cycle times. Some workshops connect to existing hot water systems to improve performance in cold climates or winter operations.
Hard water creates scale buildup on nozzles and internal components. If your area has water hardness above 200mg/L, a water softener or filtration system prevents ongoing maintenance issues.
Drainage Infrastructure and Environmental Compliance
The wet blaster drainage system handles contaminated water containing spent media, metal particles, rust, paint, and oils. Discharging this directly to stormwater drains violates environmental regulations in every Australian state.
Floor drainage must connect to trade waste systems or holding tanks – never to stormwater. Wastewater discharge contains suspended solids requiring settlement or filtration before disposal. Most workshops install three-stage settlement tanks where solids separate from water through gravity.
Settlement tank sizing depends on blasting volume. A workshop running 4-6 hours daily needs minimum 1,000-litre settlement capacity. Budget $2,000-$5,000 for basic settlement infrastructure. Heavy duty parts washers and wet blasters in the same workshop often share settlement infrastructure – plan for combined flow volumes if this applies to your facility.
Some workshops eliminate this drainage complexity by using closed-loop systems with no discharge. These filter and recirculate all water, with periodic sludge removal. Higher initial cost ($8,000-$15,000) but eliminates trade waste permits and ongoing discharge fees.
Sludge disposal represents an ongoing operational cost. Spent abrasive mixed with metal particles typically classifies as industrial waste requiring licensed disposal. Budget $200-$400 per cubic metre for removal and processing.
Ventilation, Media Storage, and Workshop Integration
Ventilation and Dust Control
Despite using water suppression, wet abrasive blasters still generate fine mist and airborne particles during operation. Adequate workshop ventilation prevents humidity buildup and removes airborne contaminants. Minimum 10 air changes per hour is recommended for enclosed workshops.
Cabinet exhaust systems are essential for operator comfort and visibility. Most industrial wet blasters include integrated exhaust ports requiring ducting to exterior. A 150-200mm diameter duct with 300-500 cubic metres per hour extraction capacity handles typical cabinet emissions.
Position exhaust discharge points away from workshop air intakes, neighbouring properties, and public areas. Local council regulations may specify minimum discharge heights or filtration requirements.
Humidity control becomes critical in workshops running wet blasters continuously. Excess moisture causes rust on nearby equipment, tools, and stored parts. Dehumidification or increased general ventilation helps in poorly ventilated buildings.
Media Storage and Workflow Positioning
Wet blasting media management is an ongoing operational task. Abrasive media storage requires dry, accessible space near the blaster. A typical workshop stocks 200-500 kilograms of various media types. Store media in sealed containers to prevent moisture absorption – damp media clogs nozzles and reduces blasting efficiency.
Wet blasting media management includes planning for spent media disposal. Even with recirculation systems, media degrades and requires replacement. Designate separate collection containers for spent media. Contaminated media mixing with fresh stock ruins blasting performance.
Wet abrasive blaster setup positioning should follow natural workflow principles. Place the unit between parts preparation areas and final assembly zones. This minimises handling distance and keeps contaminated parts away from clean assembly areas.
Manual parts washers or automated cleaning equipment positioned near the wet blaster creates a complete cleaning workflow. Many components need degreasing before blasting, then final washing after. Group these processes to reduce handling time.
Stainless steel parts washers used in food processing and hygiene-sensitive industries pair well with wet abrasive blasters for surface preparation work. Position both units within the designated cleaning zone.
Pre-Installation Checklist and Planning Summary
Critical Pre-Delivery Verification Steps
Before scheduling equipment delivery, verify every requirement on this checklist. Missing items cause installation delays and unexpected costs.
Electrical:
- Three-phase 415V supply with 32-amp capacity
- Dedicated circuit with isolator switch
- RCD protection installed and tested
- Cable run within 20 metres of switchboard (or heavier cable for longer runs)
Compressed air:
- 200 or more litres per minute capacity at 80-100 PSI
- Air preparation system (separator, filter, regulator) installed
- 19mm minimum line size confirmed
- Quick-disconnect within 3 metres of machine
Water supply:
- 40 or more PSI supply pressure confirmed
- Isolation valve installed
- 20-40 litres per minute flow rate verified
- Water hardness assessment completed
Drainage:
- Trade waste connection or settlement tanks (1,000 or more litre capacity)
- Environmental compliance verified
- Sludge disposal arrangements confirmed
- Floor gradient toward drain confirmed
Space and ventilation:
- 4-6 square metres floor area confirmed
- 2 or more metre operator clearance
- 1 or more metre maintenance access
- 2.5 or more metre ceiling height
- Cabinet exhaust ducting installed (150-200mm diameter)
Making Setup Requirements Work for Your Workshop
Every workshop faces different constraints – space limitations, utility capacity, budget restrictions. The key is identifying which requirements are non-negotiable versus which offer flexibility. Three-phase power, adequate abrasive blasting compressed air, and proper wet blaster drainage system infrastructure fall into the non-negotiable category.
Hotwash Australia provides pre-installation assessments to evaluate your existing infrastructure and recommend upgrades before equipment delivery. Providing accurate facility information upfront prevents costly surprises during installation.
Workshop integration planning takes more effort than simply finding floor space and plugging in equipment. The workshops that get setup right from the start avoid the frustration, downtime, and additional costs that plague poorly planned installations.
Hot tanks and other specialised cleaning equipment require similar upfront planning. If your workshop is building a complete cleaning capability – blasting, washing, and immersion cleaning – plan all utility requirements together for maximum efficiency and minimum installation cost.
Conclusion
Wet abrasive blaster setup done correctly creates a powerful and reliable cleaning capability. Wet blasting media management, abrasive blasting compressed air supply, wet blaster drainage system design, and workshop integration planning all need to be in place before your machine arrives.
The investment in proper setup infrastructure pays back through reliable operation, reduced maintenance, and consistent cleaning performance. Shortcuts during installation create ongoing problems that always cost more to fix than they would have cost to prevent.
To discuss wet abrasive blaster setup requirements for your workshop, reach out to our abrasive blasting specialists or email us at sales@hotwash.com.au.

Leave A Comment